Tuesday, July 15, 2014

FragmentStatePagerAdapter getItem not called

Using FragmentStatePagerAdapter instead of FragmentPagerAdapter might fix this problem. 

FragmentPagerAdapter stores the whole fragment in memory, and could increase a memory overhead if a large amount of fragments are used in ViewPager. But FragmentStatePagerAdapter only stores the savedInstanceState of fragments, and destroys all the fragments when they lose focus. 

Hence FragmentStatePagerAdapter should be used when we have to use dynamic fragments.

Wednesday, July 9, 2014

Cannot modify header information headers already sent error

If you are a wordpress user sometime you might end up facing error similar to this while logging in as an admin.


Warning: Cannot modify header information - headers already sent by (output started at /home/smarttra/public_html/vkslabs.com/wp-content/themes/news/functions.php:6) in /home/smarttra/public_html/vkslabs.com/wp-includes/pluggable.php on line 896

Possible fixes for this issue includes

1. Remove blank spaces before <? and after ?> in functions.php under wp-includes folder
2. Add ob_start(); as the first line right after <? in functions.php


Sunday, July 6, 2014

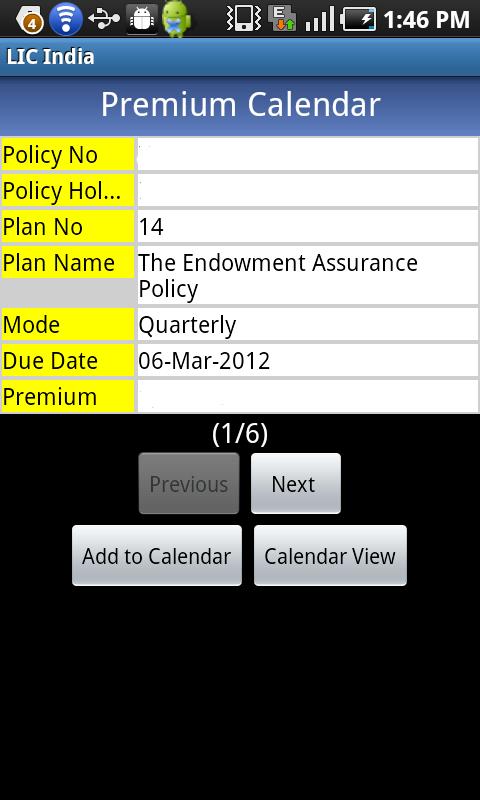
Android Application - LIC (Life Insurance Corporation)

LIC application allows you to maintain your insurance policies with Life Insurance Corporation of India (LIC India). The application allows you to add premium due dates to your calendar so that you don't miss your premium payment.

Download for free 
 

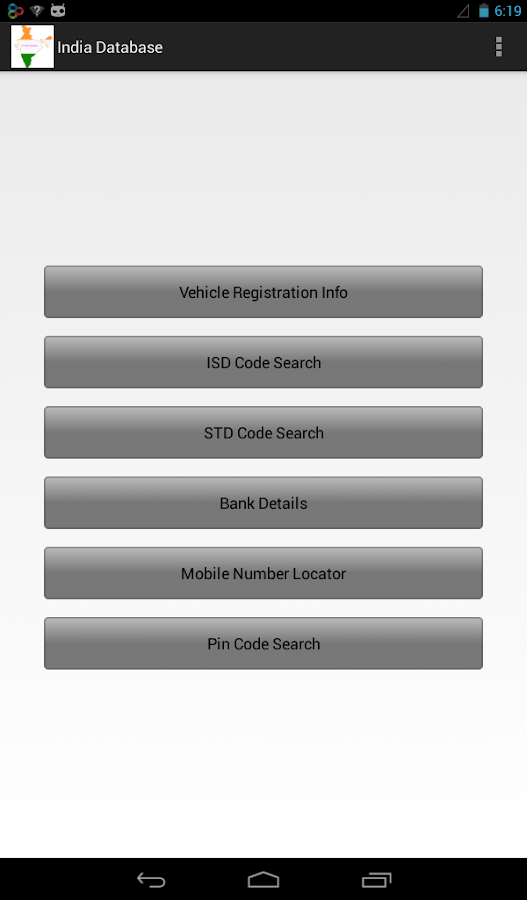
Android Application - India Database

Finally an application that provides all the information you need to know about India. The application *works offline* hence no need to be connected to Internet all the time. The application can be downloaded from the Android Google play market from here or scanning it using your phone


1. Bank Details
The app provides you the following information of more than 150 Banks and 90000 branches.
• Bank Name
• Branch Name
• IFSC Code
• MICR Code
• Contact Details
• Address


You can search a bank detail by using the following information
• IFSC Code
• MICR Code
• Location


2. Pin Code DetailsThe app provides Pincode details of more than 40000 locations. You can find details of a location by searching using Pincode or find Pincode by searching using the location details.
• 40,000+ Pin Codes


3. STD & ISD CodeThe app allows you to Search Location by entering the code and you can also find the code by entering the location details.
• 2500+ STD Codes
• 250+ ISD Codes


4. Vehicle Registration Details Find the district and RTO details for a vehicle registration number.
Search by location to find the registration numbers for that particular location.
• 1000+ RTO Records.


5. Mobile Number LocatorFind the location of a mobile number using its first 4 digits.

Note:
The application doesn’t support mobile numbers that were ported from a different carrier.
Please don’t expect the app to provide real time location of entered mobile number since it is beyond the scope of the application and is a privacy concern.

• 1500+ Mobile Number Records.

Monday, May 19, 2014

Eclipse Error : contains native libraries that will not run on the device

Few days back I wanted to try Crittercism's NDK library and ended up facing the following error in Eclipse after following exactly the same steps given on their site.

The library 'crittercism_v4_5_1_ndk.jar' contains native libraries that will not run on the device.

The following libraries were found:

- assets/armeabi-v7a/libcrittercism-ndk.so

- assets/armeabi/libcrittercism-ndk.so

This error could be avoided by the following Steps.

Eclipse Preference ->Android->Build->Un Check "Force error when external jars contain native libraries"

Monday, January 6, 2014

Disable CellBroadcast in Cyanogenmod

The problem started last week when I started receiving Cell Broadcast alerts non stop all day. My phone is Samsung Galaxy S2 and was running on latest version of Cynogenmod. After searching in some Android forums I found a way to disable all kinds of cell broadcast by using  option in Message application.

Message->Menu->Cell Broadcast

Even after doing so the problem did not go away. Finally after lot of searching I found a way to do this. Use Terminal Emulator and execute the following commands.
su
mount -orw,remount /system
rm /system/app/CellBroadcastingReceiver.apk
reboot

Friday, November 15, 2013

UI≠UX

Difference between UI and UX

1


The most common misconception we come across in the workplace, in client meetings or even in the Job listings is that the terms UI and UX are interchanged and used in the wrong context. Though both the terms look and spell alike there is a substantial difference in the overall objective and scope.

User Interface (UI) is a medium of communication between a person and a system. UI encompasses approaches and elements that allows the user to interact with the system. In other terms UI can be considered as the most powerful tool that designer use to bring out a great user experience.

On the other hand User Experience (UX) is:

  • The overall experience

  • A combination of various interface, UI being an important one among it.

  • Thrives to address everything perceived by a person


2


A UI designer can only solve a part of the equation by creating tools such as images, icons, text but the user experience is much larger than that and is influenced by a multitude of things such as functional performance, color scheme, ease of use etc. Hence for an organization it is very important to understand the basic difference between the two roles and hiring the right candidate with proper skill set.


Last but not the least...


This is what happens when you let a developer play the role of UI/UX designer

3


4

Wednesday, April 10, 2013

Initializing NIST JAIN SIP Stack

This tutorial uses NIST SIP JAIN Reference Implementation. Download the NIST source code from here.


public void init() {
try {
// Get the local IP address.
this.ip = InetAddress.getLocalHost().getHostAddress();
// Create the SIP factory and set the path name.
this.sipFactory = SipFactory.getInstance();
this.sipFactory.setPathName("gov.nist");
// Create and set the SIP stack properties.
this.properties = new Properties();
this.properties.setProperty("javax.sip.STACK_NAME", "stack");
this.properties.setProperty("gov.nist.javax.sip.TRACE_LEVEL", "32");

if(proxy != null) {
this.properties.setProperty("javax.sip.OUTBOUND_PROXY", proxy + ':' + port + '/' + protocol);
}

this.properties.setProperty(
"gov.nist.javax.sip.LOG_MESSAGE_CONTENT", "true");
this.properties.setProperty("gov.nist.javax.sip.DEBUG_LOG",
"mss-jsip-debuglog.txt");
this.properties.setProperty("gov.nist.javax.sip.SERVER_LOG",
"mss-jsip-messages.xml");
// Create the SIP stack.
this.sipStack = this.sipFactory.createSipStack(this.properties);
// Create the SIP message factory.
this.messageFactory = this.sipFactory.createMessageFactory();
// Create the SIP header factory.
this.headerFactory = this.sipFactory.createHeaderFactory();
// Create the SIP address factory.
this.addressFactory = this.sipFactory.createAddressFactory();
// Create the SIP listening point and bind it to the local IP
// address, port and protocol.
this.listeningPoint = this.sipStack.createListeningPoint(this.ip,
this.port, this.protocol);
// Create the SIP provider.
this.sipProvider = this.sipStack
.createSipProvider(this.listeningPoint);
// Add our application as a SIP listener.
this.sipProvider.addSipListener(this);
// Create the contact address used for all SIP messages.
this.contactAddress = this.addressFactory.createAddress("sip:" + this.username + "@"
+ this.ip + ";transport=tcp");
// Create the contact header used for all SIP messages.
this.contactHeader = this.headerFactory
.createContactHeader(contactAddress);
// Display the local IP address and port in the text area.
} catch (Exception e) {
e.printStackTrace();
// If an error occurs, display an error message box and exit.
System.exit(-1);
}
}

Digest authorization in SIP with MD5 Challenge

During a SIP request if the server responds with 401 Proxy Authentication Required or 401 Unauthorized then it means the client has to replay the same request again with MD5 challenge.

The client should use nonce value from the response header WWW-Authenticate.

[code]

WWW-Authenticate: Digest realm="sip.linphone.org", nonce="JbAO1QAAAAA3aDI0AADMobiT7toAAAAA", opaque="+GNywA==", algorithm=MD5, qop="auth"

[/code]

The client should use nonce to generate the MD5 challenge and make the original request again with the Authorization header.

Steps to create the MD5 Challenge

1. Create first MD5 hash using username + ":" + realm + ":" + password

[java]

String a1 = username + ":" + realm + ":" + password;
String ha1 = toHexString(mdigest.digest(a1.getBytes()));
[/java]

2. Create second MD5 hash using request_method + ":" + request_uri

[java]

String a2 = request_method.toUpperCase() + ":" + request_uri;
String ha2 = toHexString(mdigest.digest(a2.getBytes()));
[/java]

3. If qop in the response header is "auth" then the final MD5 hash is calculated using step 3a else if it is undefined or empty refer step 3b.

3a. Create the final MD5 string using ha1 + ":" + nonce + ":" + nonceCount + ":" + cNonce + ":" + qop + ":" + ha2

[java]

String finalStr = ha1 + ":" + nonce + ":" + nonceCount + ":" + cNonce + ":" + qop + ":" + ha2;
String response = toHexString(mdigest.digest(finalStr.getBytes()));
[/java]

3b. Create the final MD5 string using ha1 + ":" + nonce + ":" + ha2

[java]
String finalStr = ha1 + ":" + nonce + ":" + ha2;
String response = toHexString(mdigest.digest(finalStr.getBytes()));
[/java]

Download the complete source code from here

Tuesday, April 9, 2013

SIP Register Request using JAIN SIP

This tutorial uses NIST SIP JAIN Reference Implementation. Download the NIST source code from here.

Note: To understand the Authorization process for handling 401 response code from server please go through this tutorial.

REGISTER request is used to update the current location of a user on the REGISTRAR server. The application sends a REGISTER message informing the server its current location which in turn is stored in location server. When a caller calls a user the proxy server uses this information to find the location of the callee.

Register request should be sent by the client periodically. The validity of the REGISTER request is determined by the Expires header.

Flow

image

Sample Request

[code]
REGISTER sip:sip.linphone.org SIP/2.0
Call-ID: 0a0f14355fa76ae6435b98bfe085baf9@223.1.1.128
CSeq: 1 REGISTER
From: &amp;lt;sip:vkslabs@sip.linphone.org&amp;gt;;tag=-1427592833
To: &amp;lt;sip:vkslabs@sip.linphone.org&amp;gt;
Max-Forwards: 70
Via: SIP/2.0/TCP 223.1.1.128:5060;branch=z9hG4bK-323532-2a454f4ec2a4213f6d6928eba479521d
Contact: &amp;lt;sip:vkslabs@223.1.1.128;transport=tcp&amp;gt;
Content-Length: 0
[/code]

Now lets see how to construct the above request using the NIST SIP Stack.

First step is to create a class that implements the SIPListener. Make sure your SIP Stack is Initializing NIST JAIN SIP Stack.

1. Create Call-ID header

[java] CallIdHeader callIdHeader = this.sipProvider.getNewCallId(); [/java]

2. Create CSeq header

[java] CSeqHeader cSeqHeader = this.headerFactory.createCSeqHeader(cseq, &amp;amp;quot;REGISTER&amp;amp;quot;); [/java]

3. Create From header

[java] Address fromAddress = addressFactory.createAddress(&amp;quot;sip:&amp;quot; + username + '@' + server);
FromHeader fromHeader = this.headerFactory.createFromHeader(fromAddress, String.valueOf(this.tag));
[/java]

4. Create To Header

[java] ToHeader toHeader = this.headerFactory.createToHeader(fromAddress, null); [/java]

5. Create Max-Forwards header

[java] MaxForwardsHeader maxForwardsHeader = this.headerFactory.createMaxForwardsHeader(70); [/java]

6. Create a Via header

[java]
ArrayList viaHeaders = new ArrayList();
ViaHeader viaHeader = this.headerFactory.createViaHeader(this.ip, this.port, &amp;quot;tcp&amp;quot;, null);
viaHeaders.add(viaHeader);
[/java]

7. Create contact header

[java]
this.contactAddress = this.addressFactory.createAddress(&amp;quot;sip:&amp;quot; + this.username + '@' + this.ip + &amp;quot;transport=tcp&amp;quot;);
// Create the contact header used for all SIP messages.
this.contactHeader = this.headerFactory.createContactHeader(contactAddress);
[/java]

Once all the headers are created it is time to create the request itself.

[java]
request = this.messageFactory.createRequest(&amp;quot;REGISTER sip:&amp;quot; + server + &amp;quot;SIP/2.0\r\n\r\n&amp;quot;);
request.addHeader(callIdHeader);
request.addHeader(cSeqHeader);
request.addHeader(fromHeader);
request.addHeader(toHeader);
request.addHeader(maxForwardsHeader);
request.addHeader(viaHeader);
request.addHeader(contactHeader);
[/java]

Now that the request object is created with all the necessary headers it is time to send the request.

[java] inviteTid = sipProvider.getNewClientTransaction(request);
// send the request out.
inviteTid.sendRequest();
[/java]

Once the request is sent successfully the response will be passed to the application using the processResponse callback in SIPListener.

[java]
public void processResponse(ResponseEvent responseEvent) {
int statusCode = responseEvent.getResponse().getStatusCode();
}
[/java]

Code

[java]
public void register(Response response) {
try {
cseq++;
ArrayList viaHeaders = new ArrayList();
ViaHeader viaHeader = this.headerFactory.createViaHeader(this.ip,
this.port, &amp;quot;tcp&amp;quot;, null);
viaHeaders.add(viaHeader);
// The &amp;quot;Max-Forwards&amp;quot; header.
MaxForwardsHeader maxForwardsHeader = this.headerFactory
.createMaxForwardsHeader(70);
// The &amp;quot;Call-Id&amp;quot; header.
CallIdHeader callIdHeader = this.sipProvider.getNewCallId();
// The &amp;quot;CSeq&amp;quot; header.
CSeqHeader cSeqHeader = this.headerFactory.createCSeqHeader(cseq,
&amp;quot;REGISTER&amp;quot;);

Address fromAddress = addressFactory.createAddress(&amp;quot;sip:&amp;quot;
+ username + '@' + server);

FromHeader fromHeader = this.headerFactory.createFromHeader(
fromAddress, String.valueOf(this.tag));
// The &amp;quot;To&amp;quot; header.
ToHeader toHeader = this.headerFactory.createToHeader(fromAddress,
null);

// this.contactHeader = this.headerFactory
// .createContactHeader(contactAddress);

request = this.messageFactory.createRequest(&amp;quot;REGISTER sip:&amp;quot;
+ server + &amp;quot; SIP/2.0\r\n\r\n&amp;quot;);
request.addHeader(callIdHeader);
request.addHeader(cSeqHeader);
request.addHeader(fromHeader);
request.addHeader(toHeader);
request.addHeader(maxForwardsHeader);
request.addHeader(viaHeader);
request.addHeader(contactHeader);
if (response != null) {
retry = true;
AuthorizationHeader authHeader = Utils.makeAuthHeader(headerFactory, response,
request, username, password);
request.addHeader(authHeader);
}
inviteTid = sipProvider.getNewClientTransaction(request);
// send the request out.
inviteTid.sendRequest();
this.dialog = inviteTid.getDialog();
// Send the request statelessly through the SIP provider.
//            this.sipProvider.sendRequest(request);

// Display the message in the text area.
logger.debug(&amp;quot;Request sent:\n&amp;quot; + request.toString() + &amp;quot;\n\n&amp;quot;);
} catch (Exception e) {
// If an error occurred, display the error.
e.printStackTrace();
logger.debug(&amp;quot;Request sent failed: &amp;quot; + e.getMessage() + &amp;quot;\n&amp;quot;);
}
}
[/java]

Download the complete working code from here.

Monday, April 8, 2013

Introduction to SIP

SIP stands for Session Initiation Protocol a signaling protocol defined by IETF used for controlling communication sessions. SIP is used to create, manage and terminate sessions in an IP based network. SIP is widely used in VOIP (Voice over IP) .


The two main entities in a SIP session are

User Agent Client

User Agent Server

There are several types of server


Proxy Server

Redirect Server

Registrar

Location Server


SIP is similar to HTTP protocol. To understand the differences lets first learn how HTTP Protocol works.

Here is a sample HTTP request

GET /index.html HTTP/1.1

Host: www.w3.org

User-Agent: Mozilla/5.0 (Windows NT 5.1; rv:20.0) Gecko/20100101 Firefox/20.0

Accept: text/html,application/xhtml+xml,application/xml;q=0.9,*/*;q=0.8

Accept-Language: en-US,en;q=0.5

The first line is the request line which has the request method (GET), the URI that is being requested (index.html) and the protocol version (HTTP/1.1)

Following the request line is one or more request headers like Host, User-Agent etc.

An empty line break follows the request headers which is followed an options message body.

Once you understand the protocol you can mimic a browser and send a request to web server using telnet or a simple java program that uses plain socket.

TBD

Now lets take a look at SIP protocol and find out the differences between HTTP and SIP

Here is a sample SIP request

REGISTER sip:ss2.biloxi.example.com SIP/2.0
Via: SIP/2.0/TLS client.biloxi.example.com:5061;branch=z9hG4bKnashds7
Max-Forwards: 70
From: Bob <sips:bob@biloxi.example.com>;tag=a73kszlfl
To: Bob <sips:bob@biloxi.example.com>
Call-ID: 1j9FpLxk3uxtm8tn@biloxi.example.com
CSeq: 1 REGISTER
Contact: <sips:bob@client.biloxi.example.com>
Content-Length: 0
 

The first line is the request line which has the request method (REGISTER), the URI that is being requested (index.html) and the protocol version (HTTP/1.1)

Following the request line is one or more request headers like Host, User-Agent etc.

An empty line break follows the request headers which is followed an options message body.

Thursday, April 4, 2013

Capturing Android SIP Logs using TCPDump

Please make sure your device is rooted before following these steps.

1. Start adb in root mode by entering the following command
            adb root

2. Download the tcpdump binary from either http://www.tcpdump.org or here

3. Push tcpdump to the device.
            adb push tcpdump-arm /data/local/

4. Make sure correct permission is set for tcpdump.
            adb shell chmod 777 /data/local/tcpdump-arm

5. Start capturing the network packets. Replace any with your interface name. In my case it was wlan0.
            adb shell /data/local/tcpdump-arm -i any -p -s 0 -w /data/local/captured.pcap

6. Once the network packets are captured we can copy that back to your machine to view it in wireshark.
            adb pull /data/local/captured.pcap

7. View the SIP packets in wireshark using the view filter.


Note: Wireshark can be downloaded from http://www.wireshark.org/download.html

Saturday, February 16, 2013

Setting Firefox location bar search engine

Recently I installed a freeware which came with ask.com plugin for firefox. This plugin after installing became default for lot of features in the browser which was really irritating me so had to remove the plugin.

Even then any search I do by entering the keyword directly in the address bar (location bar) went through ask.com. If you are also facing similar problem here are the steps to set your favorite search engine.

1. Type in about:config in the location bar and press Enter
2. You might see the This might void your warranty! warning screen. Click I'll be careful, I promise! to continue.
about
3. Enter keyword.URL in search field and press Enter.
4. Double click the keyword.URL to modify the value. Here is the list of URL for different search engines.
about1
Google
https://www.google.com/search?q=

Yahoo
http://search.yahoo.com/search?p=

Bing
http://www.bing.com/search?q=

Note
To disable this feature enter keyword.enabled and double click to set the value to true.

Tuesday, February 12, 2013

Declaring java package and method signature in JRuby

We can add the package declaration for the java classes generated by JRubyc by using java_package. Just add the following line before the JRuby class declaration

java_package 'package name'

And also make sure you have included the statement require 'java'.

[ruby]
require 'java'
java_package 'com.vkslabs.example.ruby'
class MyClass
def initialize()
end
def myfunction(msg)
puts msg;
end
end
MyClass.new.myfunction('Hello JRuby!');
[/ruby]

Now once you convert the code using jrubyc you will find that the package structure is automatically created.

Similarly you can declare signatures for java methods using
java_signature 'put method signature here'

[ruby]
require 'java'
java_package 'com.vkslabs.example.ruby'
class MyClass
def initialize()
end
java_signature 'void myJavaMethod(String msg)'
def myfunction(msg)
puts msg;
end
end
MyClass.new.myfunction('Hello JRuby!');
[/ruby]

Now you can call the new method signature from your java code by creating object for MyClass

[java]
import com.vkslabs.example.ruby;
class Test
{
public static void main(String[] a) {
MyClass obj = new MyClass();
obj.myJavaMethod(&quot;Hello Jruby from Java&quot;);
}
}
[/java]


Make sure you include jruby.jar while compiling Test.java

Compiling java code

Converting JRuby to Java

Now that we know how to write a basic JRuby code lets see how to convert the JRuby code in to Java code. JRuby comes with JRubyc a cross compiler that does the magic!

Convert to Java code
Compile JRuby in to Java Source file

Convert JRuby Java class files
Compile JRuby in to Java class file

Okay great! now you have Java source class for your JRuby class but what if you want to declare package and method signature for the generated java class?

Introduction to JRuby

JRuby
JRuby is an implementation of Ruby which runs on top of Java Virtual Machine. JRuby code can be embedded in Java code and your JRuby code can interact with Java Objects and has access to every Java API.

Why to use JRuby?
Ruby being a scripting language is dynamic and much faster than Java. There are lot of things that can be easily accomplished in Ruby for example I found that parsing & scraping HTML is much easier and faster in Ruby using HPricot. As a Java programmer and you can write part of your application in JRuby and then either embed this in your Java code or use JRubyC compiler to convert your JRuby code in to Java.

Your first JRuby program

[ruby]
require 'rubygems'
class MyClass
def initialize()
end
def myfunction(msg)
puts msg;
end
end
MyClass.new.myfunction('Hello JRuby!');
[/ruby]

Executing the above code can be done using the following command
jruby

Monday, February 11, 2013

Handling Home Key in Android

I recently came across "Todler lock" application which had lot of interesting features. One of the most intriguing feature was handling  of Home key event.

1.Create a Activity Alias

We use Activity alias in order to programmatically enable or disable home screen launcher. An alias of an activity acts as an independent entity and intent filters that are not in the original activity can be added.

Declare your activity and declare an alias for your activity with the following intent filters


[xml]
<activity
android:name="com.vkslabs.example.MainActivity"
android:label="@string/app_name" >
<intent-filter>
<action android:name="android.intent.action.MAIN" />
<category android:name="android.intent.category.LAUNCHER" />
</intent-filter>
</activity>
<activity-alias
android:name=".MainActivityAlias"
android:targetActivity="com.vkslabs.example.MainActivity"
>
<intent-filter>
<action android:name="android.intent.action.MAIN" />
<category android:name="android.intent.category.HOME" />
<category android:name="android.intent.category.DEFAULT" />
<category android:name="android.intent.category.MONKEY"/>
</intent-filter>
</activity-alias>
[/xml]

2. Enabling and disabling component using setComponentEnabledSetting
[java]
PackageManager manager = getPackageManager();
ComponentName compName = new ComponentName("com.vkslabs.example", "com.vkslabs.example.MainActivityAlias");
//ComponentName compName = new ComponentName("<Package Name>", "<Package Name.Alias Name>");

manager.setComponentEnabledSetting(compName,
PackageManager.COMPONENT_ENABLED_STATE_ENABLED, PackageManager.DONT_KILL_APP);
[/java]
You can use COMPONENT_ENABLED_STATE_DISABLED for disabling the alias.

Thursday, January 31, 2013

Saving bitmap buffer as bitmap image

Eclipse Memory Analyzer doesn’t provide option to view a bitmap buffer directly. Try the following steps that will allow you to save the bitmap buffer as a bitmap image that you can view using any image viewer.

1. Select the bitmap buffer that you would like to Save


domtree


2. Save the buffer to your computer


Select the Location in your computer where you would like to save the buffer file. You can give any name and extension
savebuffer


3. Enable inspector view in Eclipse


Once you have saved the bitmap buffer you will have to convert the bitmap buffer to bitmap for which you will need to know height and width of the bitmap.

You can use the inspector window to view the height and width of the bitmap. If inspector window is not available you can enable it using the following option.

inspectorview


showview


4. Find the dimension of the bitmap


imagedim


5. Convert the bitmap buffer in to bitmap image


Once you have the bitmap buffer, bitmap dimension you can execute the attached java program with the following command line option.

[code]
Java MATBitmap.java &lt;input.bmp&gt; &lt;output.bmp&gt; &lt;bitmap width&gt; &lt;bitmap height&gt;
[/code]

Example

[code]
java MATBitmap debug.bmp converted.bmp 800 800
[/code]

Bingo! now you can open the converted.bmp in any image editor.

Download MATBitmap.java

Fixing Bitmap memory leaks in Android

The biggest hurdle for Android developers is memory leaks. Especially if you are using a lot of images you tend to see memory leaks more often. Android internally handles the images as Bitmaps so even if the images used are optimized or of low quality it takes the same amount of memory. For example an image of size 800X600 takes 4 bytes per pixel which means the size will be 1.8 MB (4*800*600 = 1920000 bytes) whereas the same image will be 200 KB – 600 KB based on the quality of the image.
If you are facing frequent Out Of Memory errors then the first handy tool will be DDMS and Memory Analyzer tool (MAT).

Whenever you take memory dump you could see that there are bitmaps held in heap but most of the time you will not be able to find which image exactly the bitmap instance holds. MAT doesn’t provide an easy way to view the bitmap image held in a bitmap objects.
You can do the following steps to view the image in the bitmap buffer.

Friday, April 13, 2012

Starting with JPA with JBoss and MySQL

Environment

  • JBoss 7.1.1

  • MySQL 5.5


Note: Make sure the datasource is configured properly. Visit the post (http://vkslabs.com/adding-mysql-data-store-to-jboss-7-x/) to find out how to configure datasource.

Step 1: Configure persistence.xml

Create a file called persistence.xml and add the following content

[xml]
&lt;persistence xmlns=&quot;http://java.sun.com/xml/ns/persistence&quot;
xmlns:xsi=&quot;http://www.w3.org/2001/XMLSchema-instance&quot;
xsi:schemaLocation=&quot;http://java.sun.com/xml/ns/persistence http://java.sun.com/xml/ns/persistence/persistence_2_0.xsd&quot;
version=&quot;2.0&quot;&gt;
&lt;persistence-unit name=&quot;testjpa&quot; transaction-type=&quot;RESOURCE_LOCAL&quot;&gt;
&lt;jta-data-source&gt;java:jboss/datasources/myDS&lt;/jta-data-source&gt;
&lt;class&gt;com.test.StudentBean&lt;/class&gt;
&lt;properties&gt;
&lt;property name=&quot;hibernate.dialect&quot; value=&quot;org.hibernate.dialect.MySQLDialect&quot;/&gt;
&lt;property name=&quot;hibernate.hbm2ddl.auto&quot; value=&quot;update&quot;/&gt;
&lt;property name=&quot;hibernate.transaction.jta.platform&quot;
value=&quot;org.hibernate.service.jta.platform.internal.JBossAppServerJtaPlatform&quot; /&gt;
&lt;/properties&gt;
&lt;/persistence-unit&gt;
&lt;/persistence&gt;
[/xml]

Make sure the datasource name matches the datasource configured in JBoss

Step 2: Create your bean

Create the bean which you would like to persist

[java]
package com.test;

import javax.persistence.Entity;
import javax.persistence.GeneratedValue;
import javax.persistence.Id;

@Entity (name=&quot;student&quot;)
public class StudentBean {
@Id
@GeneratedValue
private int id;
private String name;
private int age;

public int getId() {
return id;
}
public void setId(int id) {
this.id = id;
}
public String getName() {
return name;
}
public void setName(String name) {
this.name = name;
}
public int getAge() {
return age;
}
public void setAge(int age) {
this.age = age;
}
}
[/java]

  • @Entity annotations should be mentioned to denote the bean is a entity bean

  • @Id annotation makes the field as primary key of the table

  • @GeneratedValue annotation makes the field value as auto generated


Step 3: Persist your bean using EMF

[java]
EntityManagerFactory entityManagerFactory =  Persistence.createEntityManagerFactory(&quot;testjpa&quot;);
EntityManager em = entityManagerFactory.createEntityManager();
EntityTransaction userTransaction = em.getTransaction();

userTransaction.begin();
StudentBean student = new StudentBean();
student.setName(name);
student.setAge(age);
em.persist(student);
em.flush();
userTransaction.commit();
em.close();
entityManagerFactory.close();
[/java]

  1. testjpa is the name of persistence-unit in the persistence.xml

  2. Calling persist() just marks the bean for persistence and might not populate DB immediately, in order to see the data in database immediately flush() must be called.


Note:

  • The value for the property hibernate.hbm2ddl.auto can be


                        validate: validate the schema, makes no changes to the database.
                        update: update the schema.
                        create: creates the schema, destroying previous data.
                        create-drop: drop the schema at the end of the session.

  •    In case there is no exception when bean is persisted but no row is found in DB then make sure the value for the property hibernate.hbm2ddl.auto is not set to create-drop


  • Important:  The common mistake the developers make is to create the file in the META-INF folder under the project folder which is wrong.


The META-INF folder where persistence.xml is present should be in classpath but for JPA the root of the persistence unit is the WEB-INF/classes directory hence the persistence.xml should be copied in to WEB-INF/classes/META-INF folder (You might have to create META-INF folder manually).

If the persistence.xml is not created in the right folder the following error will be encountered
javax.persistence.PersistenceException: No Persistence provider for EntityManager named testjpa:       No META-INF/persistence.xml was found in classpath.

Wrong location for persistence.xml


  • In case you face the following exception make sure the persistence.xml has the  attribute transaction-type="RESOURCE_LOCAL"


ERROR [stderr] (http-localhost-127.0.0.1-8080-1) java.lang.NullPointerException
ERROR [stderr] (http-localhost-127.0.0.1-8080-1)     at org.hibernate.engine.transaction.internal.jta.JtaStatusHelper.getStatus(JtaStatusHelper.java:73)
ERROR [stderr] (http-localhost-127.0.0.1-8080-1)     at org.hibernate.engine.transaction.internal.jta.JtaStatusHelper.isActive(JtaStatusHelper.java:115)
ERROR [stderr] (http-localhost-127.0.0.1-8080-1)     at org.hibernate.engine.transaction.internal.jta.CMTTransaction.join(CMTTransaction.java:149)
ERROR [stderr] (http-localhost-127.0.0.1-8080-1)     at org.hibernate.ejb.AbstractEntityManagerImpl.joinTransaction(AbstractEntityManagerImpl.java:1207)
ERROR [stderr] (http-localhost-127.0.0.1-8080-1)     at org.hibernate.ejb.AbstractEntityManagerImpl.postInit(AbstractEntityManagerImpl.java:176)
ERROR [stderr] (http-localhost-127.0.0.1-8080-1)     at org.hibernate.ejb.EntityManagerImpl.<init>(EntityManagerImpl.java:89)
ERROR [stderr] (http-localhost-127.0.0.1-8080-1)     at org.hibernate.ejb.EntityManagerFactoryImpl.createEntityManager(EntityManagerFactoryImpl.java:125)
ERROR [stderr] (http-localhost-127.0.0.1-8080-1)     at org.hibernate.ejb.EntityManagerFactoryImpl.createEntityManager(EntityManagerFactoryImpl.java:120)